- bootMapperClient
- For Window
- Download : https://www.dropbox.com/s/3bn9flirkb49ahz/BootMapperClient.zip?dl=0
- Unzipping
-
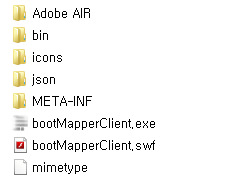
Download bootMapperClient.zip And unzip.
-
After unzipping, you can see the directory like a picture below.
- For Mac
- Download : https://www.dropbox.com/s/wselndg19ofby85/BootMapperClient.mac.zip?dl=0
2. Downloading Firmware
- Link : http://blog.winkeyless.kr/153
-
Download ps2avrGB_firmware_Vx.x.x_YYMMDD.zip
-
When unzipping 4 hex files appear. - ps2avrGB_NKRO.hex : Firmware - keymap_gb_B87(EX).hex : Key map for B.87, B.87 EX, B.mini, B.mini EX - keymap_gb_face_thumb.hex : Key map for B.face, B.thumb - keymap_gb_pad.hex : Key map for B.pad
3. How to upload firmware
-
Supporting both for Window and Mac OS
-
Available only while connected by USB
-
First of all you must upload firmware to enable all the functions properly.(When MCU was attached to the PCB by soldering, bootloader was automatically installed.)
- Start bootMapperClient.exe
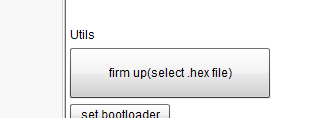
- Select “Options > firm up(select hex file)” and select firmware file.
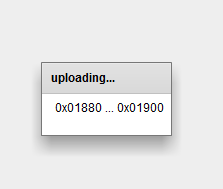
- After automatically starting bootloader, keyboard works again.
- If bootloader doesn’t start again, you have to start in manually. While pressing the key “Left ctlr”(in case of B.pad the key “0”), connect USB cable. Then bootloader will start again.
4. How to set RGB LED
- Just select “Options > connect”

- When you click “connect”, keyboard switch LEDs will be off.
- When you click “disconnect”, keyboard switch LEDs will be on and setting mode will be disconnected.
- Num of LEDs : The amount of RGB LED in PCB
- LED mode selection and color setting : Choose LED mode and set Color.(you can use hexa code to define color you want. ex, FF3300)
- Brightness : Can set the brightness of RGB LED by using slider. The brighter RGB LED, the darker switch LED.
5. How to map keys
-
Select “Key Mapper” tab
-
If it’s the first time to map keys.
2-1) Click the button labeled “load keymap_part.hex or .json” and load basic Key mapping file included in the firmware.
2-2) Select “upload” button, and then key map will be loaded after bootloader starts.
-
If you choose “reboot after uploading”, automatically it will enable the keyboard. If not, stay in the state of bootloader.
-
If you want to enable the keyboard manually, just select “Options>set keyboard” button
2-3) If you want to change key settings, click “toggle bootmapper” button.
2-4) If you press a key, a red light appear on matrix.
2-5) Just select the key code you want.
2-6) When you change all the keys, select “upload” button to upload settings.
- When you want to change the settings for only several keys from key-mapped keyboard.
3-1) Select “download” button, so download key-map. After that you will see the col/row data table.
3-2) Start bootMapper by clicking “toggle bootmapper”.
3-3) After pressing a keyboard you want to change, select the col/row and keycode value.
3-4) By selection “toggle bootmapper”, stop bootMapper.
6. Custom Macro
-
You can define maximum 12 Custom Macros.
-
A macro can have up to 42 characters.
-
Start bootMapper Client progrma
-
Select “Custom Macro” tab.
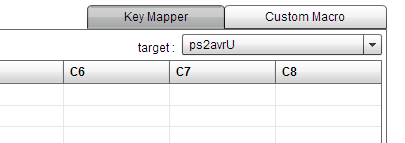
- You can see the display below
-
Select CstMacX tab(CstMac stands for “Custom Macro”.) and enter Characters you want.
-
You can delete a selected character by pressing “remove” button.
-
You can change order by dragging a character.
- Select “save macro.hex” to save Macro setting.
- When you upload this file to keyboard using bootloader.
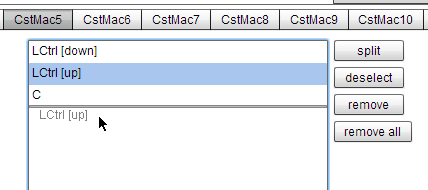
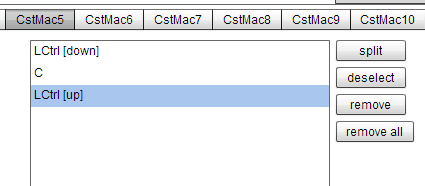
- If you want to combine modifier keys as a macro, follow the instructions.(Example shows how to set “Ctrl+c” macro.)
- Add all the keys you want to use as a macro.
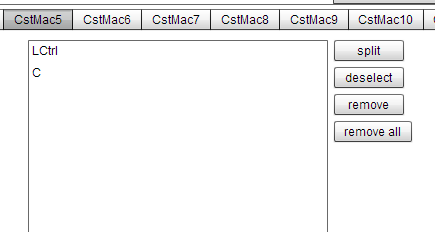
- While LCtrl selected, press the “split” button.(or shift + mouse click)
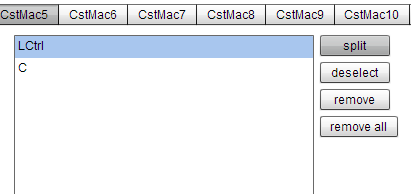
- You will see the splited LCtrl into down and up.
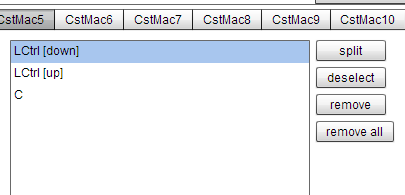
- Just drag anything to place “C” is in the middle between LCtrl(down) and LCtrl(up).
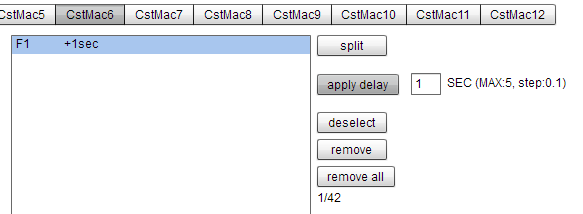
- You can set the delay for a macro.
- Selecte the key you want.
- Enter time(min 0.1 sec, max 5 secs)
- Press “apply delay” button

- Text To Macro
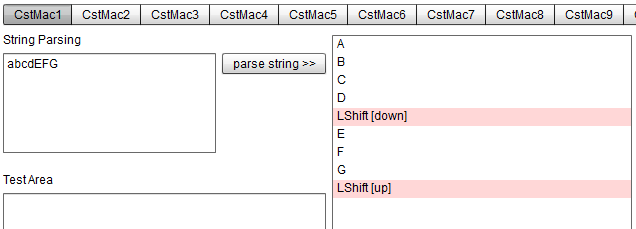
- The text entered can be translated into a macro
- Enter the text you want to us as a macro in the text box “String Parsing”

- press “parse string »” button, and then you can see all the keys splited.
- Available texts
Normal Texts : `1234567890-=qwertyuiop[]\asdfghjkl;‘zxcvbnm,./
Shift+Texts : ~!@#$%^&*()_+QWERTYUIOP{}|ASDFGHJKL:“ZXCVBNM<>?